Zardozi Embroidery

The golden age of Zardozi embroidery in India began during the Mughal period.

  • It was introduced to India by Persian craftsmen who came with the Mughal emperors.
  • Emperor Akbar (1542–1605) played a key role in promoting and perfecting the art.
  • Zardozi was extensively used in:
    • Royal garments for kings, queens, and courtiers
    • Canopies and wall hangings for palaces
    • Decorated tents and scabbards (sword covers)
    • Ceremonial costumes and accessories

During this time, Zardozi became not just a craft but a symbol of status and luxury. Every stitch reflected the power, wealth, and artistic sensibility of the Mughal courts.

Decline After the Mughals

The decline of the Mughal Empire in the 18th century had a direct impact on Zardozi.

  • Without royal patronage, artisans lost their main source of livelihood.
  • The use of real gold and silver threads became unsustainable due to rising costs.
  • With the arrival of British colonial rule and industrialization, machine-made fabrics and cheaper alternatives became popular.
  • Many skilled Zardozi artisans were forced to give up their craft and turn to other professions, leading to a significant loss of heritage.

Revival of Zardozi in Modern India

Fortunately, Zardozi did not disappear completely. In the 20th century, revival efforts began:

  • The government and handicraft organizations recognized its cultural importance and supported artisans.
  • Instead of pure gold and silver, gilt wires (copper coated with gold or silver polish) were introduced to make Zardozi more affordable and accessible.
  • Today, Zardozi thrives in several parts of India, especially in:
    • Lucknow (Uttar Pradesh) – famous for its detailed Zardozi bridal wear
    • Hyderabad (Telangana) – known for royal-style patterns
    • Agra, Delhi, and Bhopal – other centers preserving the craft

Techniques and Materials Used in Zardozi

Traditional Zardozi is a labor-intensive craft. The process involves:

  1. Base Fabric – Rich fabrics like silk, velvet, or satin are used as the canvas.
  2. Frame (Adda) – The fabric is stretched tightly on a wooden frame to provide stability.
  3. Metallic Threads – Earlier pure gold and silver, now replaced with polished copper or synthetic metallic threads.
  4. Stitches and Work – Artisans use needles to attach wires, sequins, beads, pearls, and even semi-precious stones.
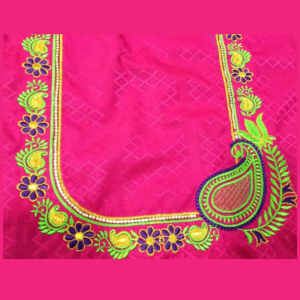
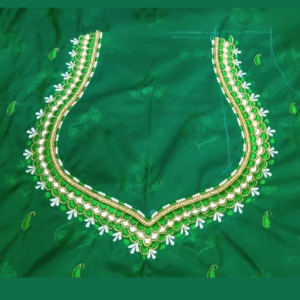
  5. Design Motifs – Inspired by nature (flowers, leaves, peacocks, vines), Mughal architecture (arches, domes), and geometric patterns.

The result is a three-dimensional raised effect, giving the embroidery a rich and opulent look.

Zardozi in Modern Fashion

Today, Zardozi continues to hold its place in both traditional and contemporary fashion:

  • Bridal Wear – Lehenga cholis, sarees, sherwanis heavily embellished with Zardozi are staples in Indian weddings.
  • Accessories – Handbags, clutches, shoes, and belts often feature Zardozi embroidery.
  • Home Décor – Cushion covers, wall panels, and curtains use Zardozi to add a regal touch.
  • Couture Fashion – Many Indian and international designers incorporate Zardozi in their collections for its timeless elegance.

The craft has transformed from being exclusive to royalty into something accessible yet still luxurious, keeping its cultural legacy alive.

Cultural Significance

Zardozi is more than just embroidery — it represents:

  • Heritage – A direct link to India’s Mughal past.
  • Artistry – A reflection of patience, skill, and creativity passed down through generations.
  • Identity – Recognition as a Geographical Indication (GI) craft in regions like Lucknow, helping artisans protect their traditional knowledge.
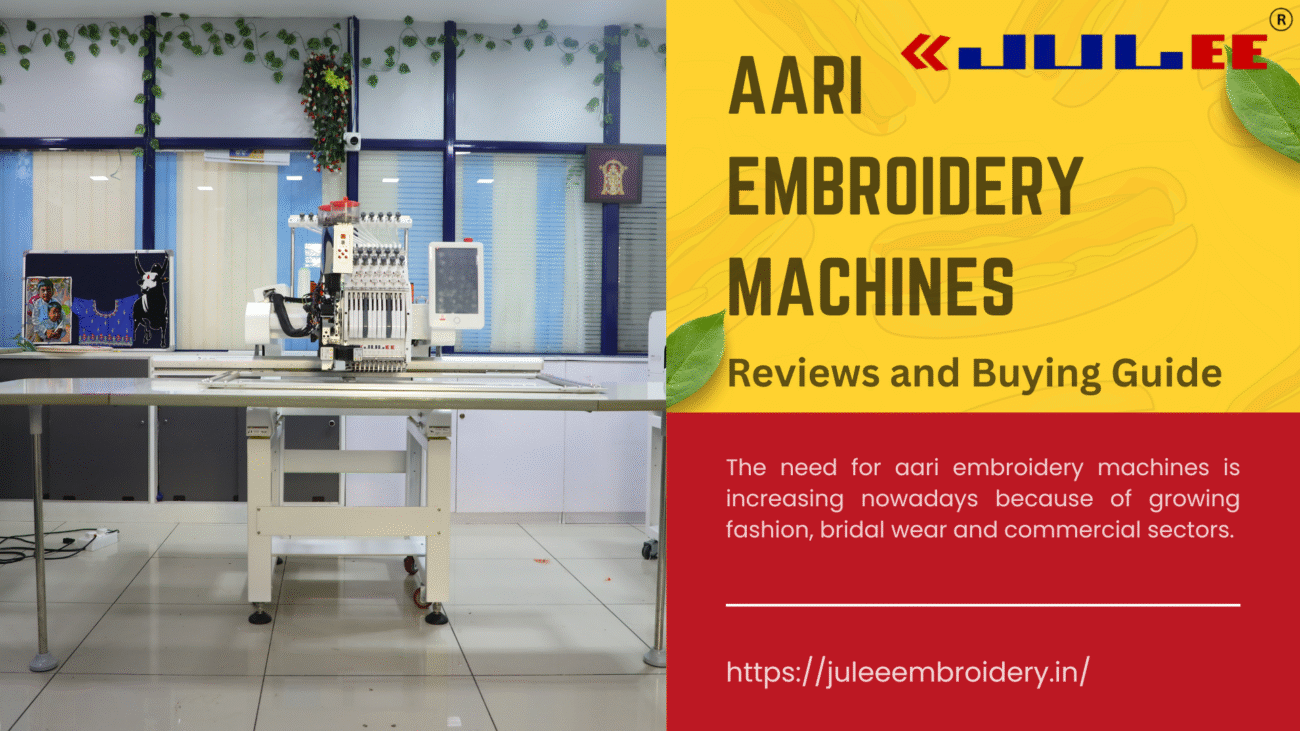
Seasonal Embroidery Business Ideas: Festive & Wedding Seasons in India

Introduction

India is a land of celebrations. From vibrant festivals to lavish weddings, there is always an occasion that calls for new clothes, gifts, and home décor. What makes these events even more special is embroidery—an art form that transforms plain fabrics into heirlooms of culture, beauty, and identity.

For embroidery businesses, the festive and wedding seasons represent golden opportunities. Unlike other markets that rely on one major shopping period in the year, India’s cultural calendar ensures multiple demand peaks. Families invest in embroidered outfits, bridal wear, accessories, and even personalized gifts, often spending more generously during these seasons.

This blog explores how embroidery entrepreneurs—whether home-based artisans or workshop owners—can tap into seasonal demand. We’ll look at festive embroidery ideas, wedding-specific opportunities, trending designs, and marketing strategies to help businesses thrive.

Why Seasonality Matters in the Embroidery Business

1. Multiple Demand Peaks

India celebrates major festivals like Diwali, Eid, Navratri, Durga Puja, Pongal, Onam, and Christmas, each with unique clothing traditions. In addition, wedding seasons arrive two to three times a year, based on auspicious dates. For embroidery businesses, this means steady waves of opportunity rather than a single peak.

2. Emotional Connection

Embroidery is not just decoration—it is cultural symbolism. A lotus or diya embroidered on a saree reflects prosperity during Diwali; a golden paisley on a bridal dupatta reflects tradition and wealth. Customers are willing to pay premium prices because embroidery carries emotional value.

3. Higher Margins

Compared to plain textiles, embroidered products command higher prices. A plain kurti may sell for ₹1,000, but add intricate embroidery and it becomes a ₹3,000 product. This margin makes seasonal embroidery especially profitable.

Festive Season Embroidery Business Ideas

Festivals are colorful, diverse, and deeply cultural. Here are ways embroidery businesses can align their products with festive demand.

1. Ethnic Wear Collections

Festive seasons often call for new sarees, lehengas, kurtis, and dupattas. Businesses can:

  • Create Diwali-themed motifs such as diyas, lotuses, and peacocks.
  • Offer Eid collections with intricate threadwork on abayas and salwar suits.
  • Design Durga Puja sarees with bold borders and festive reds.
  • Cater to Onam and Pongal with elegant embroidered kasavu sarees and dhotis.

2. Men’s Festive Wear

While women’s clothing dominates the embroidery market, men’s fashion is growing fast. Embroidered kurtas, nehru jackets, and sherwanis with subtle motifs are highly in demand during Diwali and Eid.

3. Accessories for Festivals

Accessories are small-ticket items but sell in large numbers. Ideas include:

  • Embroidered stoles and dupattas for gifting.
  • Handbags and clutches with festive motifs.
  • Belts, turbans, and scarves with subtle embroidery for men.

4. Home Décor Products

Festivals are also about decorating homes. Embroidered cushion covers, table runners, bed linens, and wall hangings make excellent products for seasonal catalogs. Many families prefer embroidered items as gifts for relatives and friends.

5. Corporate & Personalized Gifting

Businesses spend heavily on festive gifting. Offering embroidered hampers (bags, pouches, or apparel with logos) can bring bulk orders. Personalized monogram embroidery on towels, napkins, or gift sets also appeals to urban buyers.

Wedding Season Embroidery Business Ideas

If festivals are the fuel of embroidery, weddings are the fire. Indian weddings are grand, multi-day events where embroidery is not just preferred—it is essential.

1. Bridal Wear

Brides are the heart of the wedding market. Popular opportunities include:

  • Lehengas & sarees with zari, sequins, and stone embellishments.
  • Blouses and dupattas with ornate embroidery.
  • Custom motifs such as initials or symbolic designs (lotus, peacock, paisley).

2. Groom’s Outfits

Embroidery isn’t just for brides. Grooms spend heavily on:

  • Sherwanis with zari or resham threadwork.
  • Embroidered turbans and stoles.
  • Jackets with traditional motifs adapted to modern styles.

3. Group & Family Outfits

Families often order coordinated embroidery themes for bridesmaids, groomsmen, and close relatives. This trend creates bulk orders, increasing revenue for embroidery workshops.

4. Wedding Accessories

Accessories can be just as profitable as outfits. Some options:

  • Embroidered clutches, handbags, and juttis.
  • Wedding favors such as embroidered handkerchiefs or pouches.
  • Personalized monogrammed robes for the bride and groom.

5. Destination Weddings & Themes

Many couples today opt for destination weddings with themes. For example:

  • Beach weddings → floral or shell-inspired embroidery.
  • Palace weddings → heavy zari and Mughal-style motifs.
    This opens opportunities for creative customization.

Materials, Designs & Inspirations

To succeed in seasonal embroidery, businesses must select the right materials and styles.

  • Fabrics: Silk, velvet, georgette, chiffon, and organza are popular for weddings; cotton blends and light silks for festivals.
  • Threads & Embellishments: Zari, resham, sequins, pearls, and beads elevate embroidery into luxury.
  • Regional Styles: Adapting traditional techniques (Zardozi, Phulkari, Kantha, Chikankari, Kashmiri embroidery) with modern machines appeals to both local and global buyers.
  • Design Fusion: Blending traditional motifs with modern minimalism (e.g., geometric patterns with zari) caters to younger clients.

Marketing Strategies for Seasonal Success

Great embroidery is useless without visibility. Seasonal marketing is key.

1. Build an Online Presence

  • Showcase products on Instagram, Pinterest, and WhatsApp catalogs.
  • Create a website with seasonal collections and pricing.
  • Use keywords like “best bridal embroidery in Delhi” for local SEO.

2. Leverage Social Media Campaigns

  • Post festival countdowns with embroidery sneak peeks.
  • Share behind-the-scenes videos of your workshop.
  • Use trending hashtags (#DiwaliFashion, #IndianWeddingStyle).

3. Collaborate with Partners

  • Work with local boutiques, tailors, and wedding planners.
  • Provide sample pieces to fashion influencers.

4. Seasonal Offers & Pre-Booking

  • Announce limited edition collections with urgency.
  • Offer discounts for bulk family orders during wedding seasons.
  • Encourage pre-booking for festival outfits to manage demand.

5. Customer Engagement

  • Share customer testimonials and photos.
  • Create loyalty programs for repeat clients.
  • Offer referral discounts for bridesmaids/groomsmen group orders.

Scaling Beyond the Season

While festivals and weddings are peak times, smart embroidery businesses extend their revenue year-round by:

  • Launching evergreen collections of casual embroidered wear.
  • Diversifying into home décor and lifestyle embroidery.
  • Exploring export opportunities for traditional Indian embroidery.
  • Offering digitized design files for smaller businesses.

How to Create 3D Puff Embroidery Designs (Step-by-Step)

Elevate Your Embroidery Game with Stunning 3D Puff Effects

Welcome to the ultimate guide for crafting eye-catching 3D puff embroidery designs using your Julee Embroidery machines! This technique, popular for logos, apparel, and custom gifts in India, adds a bold, raised texture that stands out. Whether you’re a home-based entrepreneur or a scaling business, mastering 3D puff embroidery can set your work apart in 2025’s competitive market. Let’s dive into the step-by-step process, tailored for Indian fabrics and machine setups.

What You’ll Need

  • Embroidery Machine: A single or multi-head Julee machine with adjustable pressure and speed settings.
  • 3D Puff Foam: Pre-cut foam sheets (available from local suppliers in Surat or Delhi).
  • Thread: High-quality polyester or rayon thread in your chosen colors.
  • Stabilizer: Tear-away or cut-away stabilizer for fabric support.
  • Needles: Size 75/11 or 80/12 embroidery needles.
  • Hoop: Medium to large hoop (depending on design size).
  • Design Software: Any Julee-compatible digitizing software (e.g., Wilcom or Hatch).
  • Fabric: Cotton, blended kurtas, or sportswear materials common in India.

Step-by-Step Guide to 3D Puff Embroidery

Step 1: Prepare Your Design

  • Digitize with Care: Use your software to create or import a design. For 3D puff, focus on bold outlines and avoid intricate details—simple shapes like letters or logos work best.
  • Set Stitch Type: Use a satin stitch or zigzag stitch with a wide width (3-5 mm) to cover the foam. Adjust density to 0.4-0.6 mm for optimal puff effect.
  • Test the File: Run a test stitch on scrap fabric to ensure the design fits your foam size.

Step 2: Set Up Your Machine

  • Install the Needle and Thread: Load your machine with a fresh needle and thread matching your design.
  • Adjust Tension: Set the upper thread tension to 4-5 and lower tension to 2-3 to avoid pulling the foam.
  • Select Speed: Start at a moderate speed (600-700 SPM) to maintain control over the puff layer.

Step 3: Hoop the Fabric and Stabilizer

  • Layer Properly: Place the stabilizer under your fabric, then hoop both tightly without stretching the material.
  • Align the Design: Use the machine’s alignment tool to position your design accurately.

Step 4: Place the 3D Puff Foam

  • Cut to Size: Trim the foam to match the outline of your design, leaving a small border (1-2 mm).
  • Position Carefully: Lay the foam over the hooped fabric, aligning it with the design’s start point. Secure lightly with temporary adhesive if needed (avoid heavy glue).

Step 5: Stitch the Base Layer

  • Run the First Pass: Stitch the outline or a base layer to tack the foam in place. Use a running stitch or light satin stitch.
  • Check Alignment: Pause to ensure the foam hasn’t shifted. Adjust if necessary before proceeding.

Step 6: Add the Puff Layer

  • Stitch Over the Foam: Run the main satin stitch pass to encase the foam. Keep the machine steady to avoid uneven puffing.
  • Trim Excess: After stitching, carefully trim any foam sticking out with small scissors, staying close to the stitches.

Step 7: Finalize and Finish

  • Remove Stabilizer: Tear away or cut the stabilizer from the back, ensuring no residue remains.
  • Inspect the Design: Check for loose threads or uneven puff. Re-stitch small areas if needed.
  • Press Gently: Use a low-heat iron (with a pressing cloth) to set the design, avoiding direct heat on the foam.

Tips for Success

  • Fabric Compatibility: Test on scraps first—silk or delicate fabrics may need extra stabilizer to handle the puff weight.
  • Thread Breakage: Reduce speed if the thread snaps; check needle condition too.
  • Design Scale: Keep designs under 10×10 cm for best puff results on home machines.
  • Local Sourcing: Buy foam and threads from embroidery hubs like Tiruppur or Jaipur for cost savings.

Troubleshooting Common Issues

  • Flat Puff: Increase stitch density or use thicker foam.
  • Foam Shifting: Secure with adhesive or re-hoop tightly.
  • Thread Puckering: Lower machine tension and use a lighter stabilizer.

Why 3D Puff Rocks in 2025

This technique is trending for custom jerseys, wedding kurtas, and branded caps in India. With Julee’s multi-head machines, you can scale production for festivals like Diwali or Eid, tapping into the demand for textured, premium embroidery.

Ready to try it? Share your 3D puff creations on Instagram with #Julee3DPuff—let’s see your saap-tastic designs, bro! 😎🐍

How to Digitize Embroidery Designs for Perfect Results

Embroidery digitizing has revolutionized the way designs are created and embroidered on garments, accessories, and home décor. Whether you’re a small business owner, a hobbyist, or someone working in the apparel industry, understanding the art of digitizing embroidery designs is essential for achieving perfect results.

In this guide, we’ll cover everything you need to know about embroidery digitizing, from the basics to advanced tips, ensuring that you can create flawless designs that stand out. By the end, you’ll have a complete step-by-step process, insider strategies, and SEO-friendly knowledge that will help you master embroidery digitizing like a pro.

What is Embroidery Digitizing?

Embroidery digitizing is the process of converting artwork (logos, graphics, or illustrations) into a digital embroidery file that embroidery machines can read. This file instructs the machine how to stitch the design — including stitch type, direction, density, and sequence.

Unlike simply scanning an image, embroidery digitizing requires a skilled combination of software expertise, design understanding, and fabric knowledge.

Why It Matters

  • Ensures professional, crisp, and long-lasting embroidered results.
  • Saves time and reduces thread wastage.
  • Makes designs scalable across different products.
  • Enhances the quality of your brand presentation.

Tools Needed for Digitizing Embroidery Designs

Before diving into the step-by-step process, let’s look at the tools you’ll need:

  1. Embroidery Digitizing Software
    • Examples: Dahao EM Cad, Wilcom, Hatch, Brother PE-Design, Embrilliance, Pulse, and Ink/Stitch.
    • Each software comes with unique features like stitch simulation, editing tools, and file conversion.
  2. Embroidery Machine
    • Popular brands: Julee, Brother, Janome, Bernina, Tajima, and Ricoma.
  3. Artwork or Logo
    • High-resolution files work best (PNG, SVG, AI, or EPS).
  4. Computer/Laptop
    • Ensure you have sufficient RAM and processing power for handling large design files.
  5. Fabric and Stabilizer Samples
    • Different fabrics (cotton, polyester, denim, silk, etc.) respond differently to stitching.

Step-by-Step Guide to Digitizing Embroidery Designs

1. Prepare Your Artwork

  • Always start with a clean, high-resolution image.
  • Simplify the design (avoid overly detailed graphics that may not stitch well).
  • Ensure contrast and clarity for accurate digitizing.

2. Import Design into Digitizing Software

  • Open your embroidery software.
  • Import the artwork in the correct file format (JPEG, PNG, SVG, etc.).

3. Choose the Right Stitch Types

Embroidery isn’t just about “drawing with thread.” You must select appropriate stitch types:

  • Satin Stitch – Ideal for text and borders.
  • Fill Stitch (Tatami Stitch) – Used for larger areas.
  • Running Stitch – Outlines and fine details.

4. Adjust Stitch Density and Direction

  • Proper density prevents fabric puckering or stiffness.
  • Changing stitch direction adds depth and texture.

5. Set Underlay Stitches

Underlay stitches act as a foundation and prevent shifting. Options include:

  • Edge run underlay
  • Zigzag underlay
  • Center walk underlay

6. Optimize for Fabric Type

  • Light fabrics need lower density and softer underlay.
  • Heavy fabrics like denim require higher density.
  • Stretch fabrics demand careful stabilization.

7. Sequence Your Design

  • Digitize in a logical order (background to foreground).
  • Minimize trims and jumps for efficiency.

8. Save and Export in Machine Format

  • Save the master file (editable).
  • Export to specific machine format (DST, PES, EXP, JEF, VP3, etc.).

9. Test Stitch Out

  • Always run a sample on similar fabric before final production.
  • Adjust density, pull compensation, or thread colors as needed.

Common Mistakes to Avoid

  • Using low-resolution artwork → results in poor stitch quality.
  • Overly dense stitches → causes thread breakage and puckering.
  • Ignoring fabric type → design may not sit properly on certain materials.
  • Not testing the design → costly mistakes in production.
  • Skipping underlay stitches → reduces durability and neatness.

Advanced Tips for Perfect Embroidery Digitizing

  1. Use Auto-Digitizing Carefully
    • Many software programs offer auto-digitizing, but manual adjustments always yield better results.
  2. Apply Pull Compensation
    • Compensate for fabric stretch by slightly extending stitch lengths.
  3. Color Matching
    • Use the correct thread shade for brand consistency.
  4. Keep File Sizes Optimized
    • Large, overly complex files can slow machines down.
  5. Layer Wisely
    • Stitch larger filled areas first, then move to fine details.

Best Practices for Professional Results

  • Always maintain a balance between stitch density and design clarity.
  • Create different versions of the same design for different fabric types.
  • Keep learning! Join digitizing communities, forums, and embroidery groups.
  • Stay updated with software upgrades and industry trends.

SEO Keywords to Use Naturally

To make this blog SEO-friendly and rank organically, here are relevant keywords (use them naturally, not forced):

  • Embroidery digitizing
  • Digitizing embroidery designs
  • How to digitize embroidery
  • Best embroidery digitizing software
  • Embroidery machine file formats
  • Digitizing for embroidery step by step
  • Professional embroidery tips
  • Embroidery design conversion
  • Embroidery digitizing services

FAQs About Embroidery Digitizing

1. Can I digitize embroidery designs without software?
No, you’ll need digitizing software to create embroidery-ready files.

2. What file formats are used in embroidery machines?
Common formats include DST, PES, EXP, JEF, VP3, and HUS.

3. How long does it take to digitize a design?
Simple logos may take 20–30 minutes, while complex artwork can take several hours.

4. Is auto-digitizing good enough?
It works for basic designs, but professional results require manual digitizing.

5. Do I need professional digitizing services?
If you’re new or working with bulk orders, outsourcing to a professional digitizer may save time and reduce errors.

Julee Embroidery Machines: High‑Performance Single & Six Head Options

Introduction

Julee Embroidery Machines, based in Tirupur, Tamil Nadu, stands at the forefront of industrial-grade embroidery technology in India. Specializing in both single head and six head embroidery units, Julee delivers performance, reliability, and precision for both commercial workshops and hobbyists alike Instagram+8juleeembroidery.in+8juliembroidery.in+8Printful+3juliembroidery.in+3raven793.rssing.com+3.

1. Innovative Technology & Superior Build

Featuring advanced computer‑controlled systems, Julee machines are engineered with components like the PC‑104 DM & PTM SoC vortex 86DX, offering seamless automation and high-speed stitching accuracy embroiderymachine.wixsite.com. Whether it’s home projects or factory demands, Julee’s technology supports efficient production.

2. Versatile Capacity: Single vs Multi‑Head

  • Single Head Models (400 × 600 mm): Ideal for custom patches, badges, and small to mid-scale embroidery jobs.
  • Six Head Models: For larger production runs, these multi-head options support synchronized stitching across multiple garments, boosting output and consistency juliembroidery.injuleeembroidery.in.

3. Trusted in the Heart of Textiles: Tirupur

Located in the textile hub of Tirupur, Julee is perfectly positioned to serve a wide range of apparel manufacturers and small-scale design studios across Tamil Nadu and India. Their strong regional network ensures prompt support and ease of access to spare parts Instagram+10juleeembroidery.in+10juleeembroidery.in+10.

4. Extensive Design Libraries & Workflow

With over 3,000 built-in aesthetic and industrial embroidery designs spanning floral, monogram, and corporate styles, Julee machines make customization effortless—supported by professional-grade workflow management features YouTubeYouTube.

5. Real Use Case: Badge & Logo Embroidery

Users have showcased badge embroidery capabilities using the single head Julee machine, highlighting clean stitching, vibrant color transitions, and precision—that stands up for corporate and identity-driven applications

The Benefits of Single-Head Embroidery Machines: A Smart Investment for Small Businesses

In the dynamic world of textile customization, embroidery machines have become essential tools for businesses that want to offer personalized, high-quality products. Among the many types available, single-head embroidery machines stand out for their versatility, efficiency, and value—especially for startups, small businesses, and home-based entrepreneurs.

This article explores the key benefits of single-head embroidery machines and why they continue to be a preferred choice across various sectors of the garment and promotional product industries.


1. Compact and Space-Efficient Design

One of the most significant advantages of single-head embroidery machines is their compact size. Unlike multi-head machines that require large dedicated spaces, single-head models are ideal for small workshops, home studios, and retail environments. Their portability also allows easy relocation, making them perfect for pop-up events or trade shows.


2. Cost-Effective Investment

Starting an embroidery business or expanding production doesn’t always require a heavy investment. Single-head machines are considerably more affordable than multi-head alternatives. They offer an excellent entry point for new entrepreneurs without compromising on quality or features.

Additionally, maintenance and operating costs are generally lower, which helps businesses keep overhead expenses in check.


3. High Versatility and Functionality

Modern single-head embroidery machines are equipped with advanced features that rival those found in multi-head systems. These include:

  • Multiple needle options (often 12-15 needles)
  • Touchscreen interfaces
  • USB and network connectivity
  • Automatic thread trimming and color change

This allows users to work on a wide range of materials and garment types—from caps and shirts to bags and jackets—without switching machines.


4. Ease of Use and Learning Curve

For newcomers to the embroidery business, single-head machines are user-friendly and often come with intuitive software. The simplified interface allows for faster learning, making it easier for staff or owners to get up to speed. Many models offer built-in tutorials or support through mobile apps, which enhances user confidence and reduces training time.


5. Customization and Small-Batch Flexibility

Single-head embroidery machines are perfect for businesses that focus on small-batch production or custom, made-to-order work. Whether it’s personalizing individual garments or running limited edition product lines, these machines offer the flexibility needed to accommodate diverse customer requests quickly and efficiently.


6. Low Downtime and Quick Setup

Since there is only one head to manage, setup times are shorter, and troubleshooting is more straightforward. This means less downtime during operation, especially when changing designs or thread colors. For businesses handling multiple, varied jobs daily, this can lead to increased productivity and quicker turnaround times.


7. Scalability and Business Growth

A single-head embroidery machine can be the foundation of a growing business. Many companies start with one machine and gradually scale operations by adding more units as demand increases. This modular growth strategy minimizes risk while allowing for steady expansion based on revenue and market needs.

Traditional Embroidery Designs Reimagined with Modern Embroidery Machines…

Introduction: Tradition Meets Technology

Traditional embroidery has long been revered for its artistic, cultural, and symbolic value. From ancient Indian zardozi to Eastern European cross-stitch, every stitch holds a narrative. Today, embroidery machines are playing a pivotal role in preserving and evolving these age-old designs—bringing precision, scalability, and new life to traditional motifs.


What Are Traditional Embroidery Designs?

Traditional embroidery designs refer to culturally rooted patterns and stitch techniques passed down through generations. These motifs often reflect local flora, fauna, beliefs, and customs.

Examples include:

  • Japanese Sashiko: Functional and decorative, with geometric and repetitive patterns.
  • Hungarian Matyó: Colorful floral designs rich in symbolism.
  • Middle Eastern Tatreez: Palestinian cross-stitch with deeply symbolic tribal motifs.

How Embroidery Machines Preserve Traditional Designs

Modern embroidery machines can replicate hand-stitched patterns with extraordinary detail and accuracy. Here’s how it works:

1. Digitization of Designs

Using specialized software such as Wilcom, Hatch, or Brother PE-Design, traditional motifs are converted into digital embroidery files (DST, PES, etc.). This includes:

  • Stitch type selection (e.g., satin, fill, running stitch)
  • Direction and density of stitches
  • Layering sequence and thread color management

2. Precision Execution

The machine interprets the digital file to stitch each element exactly as designed. This ensures:

  • Uniform quality
  • Repetition of patterns at scale
  • Faster production without artistic compromise

Benefits of Machine-Made Traditional Embroidery

Cultural Preservation

Digitized embroidery files act as a cultural archive. They safeguard traditional designs from extinction and make them accessible for future generations.

Efficiency with Authenticity

Machine embroidery dramatically reduces production time while maintaining the integrity and aesthetics of original hand-stitched work.

Commercial Viability

From fashion designers to home textile brands, businesses benefit from using traditional motifs that appeal to global markets, made efficiently with machines.

Customization at Scale

Digitized designs can be easily resized or modified without altering the cultural style—ideal for customizing apparel, accessories, or home décor items.


Ethical Considerations in Machine Embroidery

With the ability to replicate comes the responsibility to respect cultural ownership. Many traditional designs have deep roots in indigenous and local communities. Ethical digitization should include:

  • Community collaboration
  • Proper attribution
  • Fair compensation for original artists or cultural custodians

Industries Embracing Machine-Embroidered Tradition

  1. Fashion & Apparel
    • Bohemian collections
    • Ethnic-inspired fashion
    • Wedding & ceremonial attire
  2. Home Textiles
    • Embroidered cushions, drapes, and linens
  3. Corporate & Promotional
    • Cultural motifs in branded apparel or souvenirs
  4. Religious & Ceremonial
    • Church vestments, religious garments, and traditional robes

traditional embroidery designs, machine embroidery, digitized embroidery patterns, cultural embroidery motifs, embroidery machines, heritage textile preservation

What Every Embroidery Works Website Must Have: A Guide to Stitching Up Online Success

In today’s digital-first world, having a visually appealing and functional website is critical—especially for embroidery businesses that thrive on aesthetics and craftsmanship. Whether you’re offering custom embroidery services, selling embroidered goods, or running embroidery workshops, your website is your digital storefront. Here’s what your embroidery works website needs to truly shine:

1. High-Quality Visuals and Portfolio

Embroidery is a visual art, and your website should showcase it beautifully.

  • Include a professional photo gallery of your past works
  • Use close-ups to highlight stitching detail and texture
  • Organize the gallery by category (e.g., apparel, home decor, monogramming)

Bonus Tip: Consider adding before-and-after images or short time-lapse videos of projects in progress.

2. Clear Service Descriptions

Visitors should know exactly what you offer at a glance. Use easy-to-read sections to describe:

  • Types of embroidery (machine, hand, custom digitizing)
  • Products available for customization (shirts, hats, bags, etc.)
  • Turnaround times and pricing (or a way to request a quote)

Pro Tip: A downloadable PDF brochure or printable order form can be helpful for B2B clients.

3. Custom Order Form or Design Tool

If you accept custom orders, make the process intuitive:

  • Include an easy-to-use order form
  • Allow file uploads for customer logos or artwork
  • Integrate a simple embroidery preview tool, if possible

This reduces back-and-forth communication and builds customer confidence.

4. Testimonials and Reviews

Social proof matters. Include:

  • Customer testimonials with photos (if possible)
  • Star ratings or case studies of larger projects
  • Links to your Google or Etsy reviews

Encouraging happy customers to share their experiences builds trust.

5. E-Commerce Functionality (if selling products)

If you sell ready-made embroidered items, you’ll need:

  • An online shop with product filters (e.g., by color, theme, item type)
  • Secure checkout and payment options (credit card, PayPal, etc.)
  • Clear shipping and return policies

Bonus: Highlight seasonal or best-selling items on the homepage.

6. About Page with a Personal Touch

People connect with people. Your About page should:

  • Tell the story behind your embroidery business
  • Introduce your team (even if it’s just you!)
  • Include behind-the-scenes photos or videos of your creative process

7. Blog or Tips Section

A blog can help with SEO and show off your expertise. Great topics include:

  • Embroidery care tips
  • DIY embroidery tutorials
  • Gift ideas featuring your products
  • Customer spotlights

This keeps your website fresh and engaging.

8. Mobile-Responsive Design

Your website must look great on phones and tablets. Key features include:

  • Fast load times
  • Easy navigation with tap-friendly menus
  • Click-to-call and map integration for mobile users

Most customers will find you on mobile—don’t lose them to poor design.

9. Contact and Social Media Integration

Make it easy for people to connect:

  • Include a contact form and your email/phone number
  • Link your Instagram, Facebook, Pinterest, or TikTok pages
  • Embed your latest social media posts for added visual flair

10. SEO and Local Optimization

Lastly, if you want to be found, you need:

  • Clear keywords (e.g., “custom embroidery in [City Name]”)
  • A Google Business Profile
  • Local backlinks and directory listings

Regular updates and blog content also help search engines rank your site higher.


Whether you’re a solo stitcher or a full-service embroidery shop, having a thoughtful, user-friendly website can turn casual browsers into loyal customers. By blending creativity with functionality, your website will reflect the craftsmanship and care you put into every thread.

🧵✨ Ready to stitch your brand into the web? Make sure your site is embroidered with the essentials.

The Perfect Logo Sizes for Embroidery: A Complete Guide

When it comes to embroidery, size matters—especially for your logo. A beautifully designed logo can lose its charm if it’s not sized correctly for embroidery. Whether you’re branding uniforms, hats, bags, or promotional items, understanding the right logo sizes ensures a crisp, legible, and professional finish. In this guide, we’ll break down the ideal logo dimensions for various embroidery applications and share tips to optimize your design.


Why Logo Size Matters in Embroidery

Embroidery isn’t like printing. Instead of ink, you’re working with thread—and thread has limitations. Small details, thin lines, and tiny text can easily become illegible or distorted if the logo is too small or too complex. Getting the size right not only preserves your brand’s identity but also helps reduce production issues and costs.


Standard Logo Sizes for Common Embroidered Items

Here’s a quick reference guide for the most common embroidered items:

1. Left Chest Logo (Shirts, Jackets, Uniforms)

  • Recommended Size: 3.5″ wide x 2″ tall (approx.)
  • Maximum Size: 4″ wide x 2.25″ tall
  • Tips: Keep text minimal and bold. Thin scripts or serifs may not translate well.

2. Hat or Cap Logos

  • Recommended Size: 2.25″ tall x 4.5″ wide (max area on the front panel)
  • Tips: Avoid overly wide or tall logos. Hats have a curved surface, so designs must be simple and centered.

3. Sleeve or Cuff Logos

  • Recommended Size: 1″ to 1.5″ tall x 2.5″ wide
  • Tips: Perfect for small icons or short brand names.

4. Back of Jacket Logos

  • Recommended Size: 10″ to 12″ wide (up to 12” x 12” depending on the hoop and machine)
  • Tips: You have more room here—use bold, scalable designs that are impactful from a distance.

5. Tote Bags or Backpacks

  • Recommended Size: 4″ x 4″ or up to 5″ x 5″
  • Tips: Consider the fabric weight—thicker materials need simpler, bolder embroidery.

Design Considerations for Embroidery

  1. Simplify Details: Fine details can get lost in small logos. Simplify complex graphics before digitizing.
  2. Use Bold Fonts: Thin fonts don’t embroider well. Go for blocky, sans-serif fonts.
  3. Minimum Letter Height: Aim for letters no smaller than 0.25 inches tall.
  4. Avoid Gradients: Embroidery can’t reproduce gradients. Stick to solid colors.
  5. Color Limitations: Most embroidery machines support up to 12-15 colors. Plan accordingly.

Digitizing: The Key to a Perfect Stitch

Before any logo can be embroidered, it must be digitized—converted into a stitch file format. A skilled digitizer will optimize your logo for thread count, stitch direction, and fabric type. Be sure to work with professionals who understand your branding needs and embroidery constraints.

post1

Aari Embroidery Machine

Aari Embroidery Machine is one of the famous embroidery art forms in recent days.One of the best worldwide machine in india is aari embroidery machine that sells and manufactured in our Julee brand machines.The designs are seen in lehenga,gown,army badges,caps,etc.This art form originated in India during the Mughal rule and was used mainly to embellish royal attires. Now this aari embroidery is practiced all over the world and you can see it in the work of  reowned fashion designers .

Machine Type – Automatic

Types Of Embroidery Machine – Sequin Machine

Voltage – 220V

Worktable Size – 500*1000 mm

No. Of Heads – Single Head

Country of Origin – Made in India

Enriched by our vast industrial experience in this domain, we are involved in providing an enormous quality range of Aari Embroidery Machine. These products require less maintenance and are easy to operate. Offered products are also precisely examined for quality before shipping to our clients.

Features:

  • High performance
  • Low maintenance
  • Reliable operation

Other Details

  • Saving Cost by using one set Computer Control to control double row embroidery heads, equal to control two embroidery machines. If it is 22 heads, double row will be 44 heads, it 33 heads double row will be 66 heads. Nearly 50 % Saving on space and human power. Computer Main Features:
  • PC 104 military system, DM & PTM SOC vortex 86DX-600MHZ process
  • Designs Qty: Supports above 1000 Patterns in Storage
  • Single pattern: Supports above 5 million stitches per single pattern
  • Language: Support multi countries language
  • USB prot : Support hot plugging
  • Main Shaft connector : Ac servo or DC motor
  • Support Motorized head locking, reduce the noise.
  • Automatic oiling function to improve working life.
  • Any device combined, such as Sequin, lockstitch chenille, independent Cording device. etc.
  • Intelligent stop-protect function: NO need to stop machine by any button or pole, just you put your hand between 2 heads that machine will stop at once. It protects worker’s very well, such as an worker is threading the needle or changing the bobbin thread but another worker pulls pole to start machine, the operation won’t be effected because intelligent stop-protect function is effective.
  • Saving area, Saving worker’s saving cost, do high production & perfect embroidery For You