Embroidery Machine Safety Tips for Operators

1. Wear the Right Safety Gear

Personal protective equipment (PPE) plays a major role in embroidery safety. Operators should:

  • Avoid loose clothing, jewelry, or accessories that could get caught in moving parts.
  • Wear safety glasses to protect eyes from broken needles or flying debris.
  • Use gloves only when handling heavy fabric rolls or frames—not while operating the machine.

2. Keep Hands and Fingers Clear

The embroidery needle operates at high speed. Always:

  • Avoid placing hands near the needle area while the machine is running.
  • Use proper tools (like tweezers or clamps) to remove thread jams.
  • Wait until the machine has fully stopped before making adjustments.

3. Follow Proper Training and Procedures

Machine safety begins with knowledge. Operators should:

  • Receive formal training before working with embroidery machines.
  • Understand how to thread, operate, and shut down the equipment.
  • Learn how to handle emergency stop buttons and other safety features.

4. Maintain a Clean and Organized Workspace

A cluttered environment increases risks. To stay safe:

  • Keep cords, fabric, and tools away from moving machine parts.
  • Clean lint and dust regularly to avoid overheating.
  • Store scissors, needles, and other sharp tools in proper containers.

5. Perform Regular Machine Maintenance

Well-maintained embroidery machines are safer and more reliable. Operators should:

  • Check needles for bends, cracks, or wear before starting.
  • Lubricate moving parts as recommended by the manufacturer.
  • Report unusual noises, vibrations, or malfunctions immediately.

6. Use Safety Features Correctly

Modern embroidery machines include built-in safety mechanisms. Operators should:

  • Always engage the machine guard before starting.
  • Familiarize themselves with the emergency stop switch.
  • Double-check machine settings before pressing start.

7. Stay Alert and Avoid Distractions

Embroidery machines require full attention. To stay safe:

  • Never operate the machine while tired or under the influence.
  • Avoid phone usage and other distractions while stitching.
  • Supervise machines during operation to prevent accidents.

Embroidery Business Success Stories in India

Embroidery in India is more than an art—it’s an identity woven into the fabric of the country’s heritage. Across states like Gujarat, Rajasthan, Kashmir, and Karnataka, embroidery traditions have not only survived but also created opportunities for entrepreneurship, women’s empowerment, and global recognition. In recent decades, many artisans and entrepreneurs have transformed this craft into thriving businesses.

This article explores some of the most inspiring embroidery business success stories in India and the lessons they hold.

🌟 1. Razia Sultan – Crewel Embroidery Entrepreneur (Kupwara, J&K)

  • Background: Born in Trehgam, Kupwara, Razia Sultan received training under the Karkhandar scheme, a government initiative aimed at skill development.
  • Journey: With determination, she set up her own unit for crewel embroidery and chain stitch, both unique to Kashmir.
  • Impact:
    • Earns ₹60,000–70,000 monthly.
    • Trained 200+ women artisans in her region.
    • Established herself as a role model for local girls who now see embroidery as a path to financial independence.
  • Lesson: Government-backed training combined with entrepreneurship can spark local employment opportunities in rural India.

🌟 2. Pabiben Rabari – Inventor of Hari Jari & Founder of Pabi Bag (Kutch, Gujarat)

  • Background: Coming from the Rabari community in Kutch, Pabiben innovated her own embroidery style called Hari Jari.
  • Journey: With the help of the social enterprise Kaarigar Clinic, she launched the globally recognized Pabi Bag brand.
  • Impact:
    • Employs over 300 artisans.
    • Featured on Shark Tank India, securing ₹50 lakh investment.
    • Annual sales of ₹36 lakh with a 35% profit margin.
    • Products are sold internationally via pabiben.com.
  • Lesson: Blending traditional craft with modern branding and global retail networks can turn local artisans into international entrepreneurs.

🌟 3. Sakeela – Custom Saree Embroidery Entrepreneur (Andhra Pradesh)

  • Background: Inspired by her mother’s tailoring work, Sakeela built her own embroidery business.
  • Journey: Initially started small, but expanded with support from Mahila Money loans and the use of social media marketing.
  • Impact:
    • Handles 20–30 online orders daily.
    • Profits rose from ₹1.18 lakh/month to ₹2 lakh/month.
    • Creates personalized sarees with intricate embroidery.
  • Lesson: Digital platforms and microfinance can empower women entrepreneurs to scale their embroidery ventures quickly.

🌟 4. Arati Hiremath – Reviving Kasuti Embroidery (Dharwad, Karnataka)

  • Background: Kasuti embroidery is a 1,300-year-old tradition from Karnataka. It was at risk of fading away.
  • Journey: Arati Hiremath launched Artikrafts, an enterprise dedicated to reviving Kasuti by training rural women.
  • Impact:
    • Trained 850 women artisans (200 still active).
    • Annual turnover of about ₹40 lakh.
    • Her Kasuti sarees are stocked by Fabindia and were even worn by Finance Minister Nirmala Sitharaman in Budget 2023.
  • Lesson: Heritage crafts can be revived and made profitable through community entrepreneurship and partnerships with retail chains.

🌟 5. Ruma Devi – Empowering 50,000 Women through Embroidery (Barmer, Rajasthan)

  • Background: From a small desert village in Barmer, Rajasthan, Ruma Devi started with one needle and thread.
  • Journey: She formed self-help groups and trained thousands of women in embroidery and handicrafts.
  • Impact:
    • Leads a network of 50,000+ rural women artisans.
    • Awarded the Nari Shakti Puraskar in 2018.
    • Promotes tribal crafts across India and internationally.
  • Lesson: Social entrepreneurship in embroidery can uplift entire communities, turning crafts into a sustainable livelihood model.

🌟 6. Lalita Vakil – Guardian of Chamba Rumal Embroidery (Himachal Pradesh)

  • Background: Chamba Rumal embroidery, a traditional Himachali art, was fading until Lalita Vakil championed its revival.
  • Journey: Through training programs, she taught hundreds of women, preserving this unique needlework.
  • Impact:
    • Honored with Padma Shri (2022) and Nari Shakti Puraskar (2018).
    • Internationally recognized for promoting cultural heritage.
  • Lesson: Recognition and preservation of endangered embroidery forms can bring pride, visibility, and opportunities to artisans.

🌟 7. Madhav Fashion – From One Machine to Market Leader (Surat, Gujarat)

  • Background: Founded in 2005 with a single embroidery machine.
  • Journey: Grew steadily into a large-scale manufacturer of embroidered fabrics, supplying to fashion brands and retailers.
  • Impact:
    • Recognized as one of India’s leading embroidery manufacturers.
    • Demonstrates how industrial-scale embroidery can coexist with traditional handcrafts.
  • Lesson: Scaling embroidery with technology can open new horizons in the textile industry.

🌍 Insights & Common Themes

  • Women Empowerment: Most success stories are led by women, turning embroidery into a source of financial independence.
  • Cultural Preservation: Heritage crafts like Kasuti, Chamba Rumal, and Hari Jari are being revived through entrepreneurship.
  • Digital Leverage: Social media, online stores, and platforms like Shark Tank have been crucial in scaling embroidery businesses.
  • Community Impact: Many entrepreneurs go beyond personal profit to uplift artisans, especially women in rural areas.
  • Global Recognition: From Paris Couture houses to Indian retail giants like Fabindia, the world is acknowledging India’s embroidery excellence.

📊 Summary Table

Entrepreneur / BrandRegionCraft / FocusImpact
Razia SultanKupwara, J&KCrewel & chain stitch₹60K–70K/month; 200 trained
Pabiben RabariKutch, GujaratHari Jari embroidery, Pabi Bag₹36 lakh sales; Shark Tank funding
SakeelaAndhra PradeshCustom saree embroidery₹2 lakh/month profit
Arati HiremathDharwad, KarnatakaKasuti embroidery₹40 lakh/year; Fabindia supplier
Ruma DeviRajasthanTraditional crafts50K+ artisans uplifted
Lalita VakilHimachal PradeshChamba Rumal embroideryPadma Shri, Nari Shakti
Madhav FashionSurat, GujaratIndustrial embroidery fabricsMarket leader since 2005

Profit Margins in the Embroidery Business: Machine ROI Explained

Running a successful embroidery business in India requires more than just creativity—it demands an understanding of profit margins and how quickly your embroidery machine ROI (Return on Investment) pays off. In this blog, we’ll explore what ROI means in INR, average profit margins in the Indian embroidery industry, and how to maximize your earnings.

Profit Margins in the Indian Embroidery Business

Profit margins determine how much you actually earn after covering expenses like:

  • Machine purchase & servicing
  • Threads, stabilizers, and garments (t-shirts, caps, uniforms, etc.)
  • Labor and electricity costs
  • Packaging, delivery, and marketing

On average, embroidery businesses in India see profit margins of 30% to 55%, depending on efficiency, scale, and pricing. A well-optimized setup can even reach margins above 60% on premium or bulk orders.

Embroidery Machine ROI in INR

Your ROI is the time it takes for your embroidery machine investment to pay for itself through profits.

ROI Formula:
ROI = (Net Profit from Jobs ÷ Machine Cost) × 100

Example:

  • Embroidery Machine Cost: ₹8,00,000 (industrial-grade multi-head machine)
  • Average Net Profit per Month: ₹1,50,000
  • ROI Timeline: ₹8,00,000 ÷ ₹1,50,000 = ~5.3 months

👉 That means in about 5–6 months, your machine is fully paid off. After that, every rupee earned is pure profit.

For smaller businesses:

  • Single-head embroidery machine cost: ₹3,00,000
  • Monthly Net Profit: ₹60,000
  • ROI Timeline: ₹3,00,000 ÷ ₹60,000 = ~5 months

Factors That Affect ROI in India

  1. Type of Machine – Multi-head machines pay off faster for bulk orders, while single-head models suit startups.
  2. Order Volume – Consistent corporate orders (uniforms, school wear, promotional caps) boost ROI.
  3. Product Pricing – Offering personalization (names, logos) allows higher pricing per unit.
  4. Operating Costs – Electricity, labor wages, and consumables can influence margins.
  5. Market Niche – Premium embroidery (bridal, ethnic wear, custom branding) earns more per piece.

How to Increase Profit Margins in Indian Embroidery

  • Target corporate clients (uniforms, schools, event merchandise) for bulk orders.
  • Offer premium services (3D puff embroidery, metallic threads, custom digitizing).
  • Bundle orders (t-shirt + cap + jacket) to boost order value.
  • Automate workflows with embroidery software for faster turnaround.
  • Maintain your machine to avoid costly downtime.

Final Words

In India’s growing embroidery market, understanding profit margins and machine ROI is key to building a sustainable business. By choosing the right machine, pricing strategically, and targeting the right clients, you can recover your investment in just 5–6 months and scale profits quickly.

If you’re planning to step into embroidery or expand your setup, always calculate ROI before investing—it’s the smartest way to ensure long-term success.

How to Increase Production with Multi Head Embroidery Machines

In the embroidery industry, efficiency is everything. Whether you’re running a small custom shop or a large-scale production house, maximizing output while maintaining quality can set you apart from competitors. One of the best ways to achieve this is by using multi head embroidery machines. These machines are designed to run multiple designs simultaneously, saving time and boosting production.

In this guide, we’ll show you practical strategies to increase production with multi head embroidery machines without compromising quality.

1. Understand the Power of Multi Head Embroidery Machines

A multi head embroidery machine allows you to stitch the same design on multiple garments at once. For example, a 6-head machine can embroider six caps, shirts, or jackets simultaneously. This significantly reduces turnaround time compared to single-head machines.

Key Benefits:

  • High-volume production
  • Consistent embroidery quality
  • Cost-efficient for bulk orders
  • Better ROI over time

2. Optimize Machine Settings for Speed & Quality

Getting the most out of your embroidery machine depends on proper settings.

  • Adjust stitch density: Too many stitches slow down production.
  • Use the right speed: Faster isn’t always better—find the balance between speed and precision.
  • Digitize smartly: Well-digitized designs reduce errors and rework.

Pro Tip: Regularly test your settings on scrap fabric before running large orders.

3. Invest in Skilled Operators & Training

Even the best machine needs a skilled operator. Proper training ensures fewer mistakes and maximum productivity.

  • Train staff on hooping, threading, and tension adjustments.
  • Encourage operators to troubleshoot minor machine issues.
  • Create a standard operating procedure (SOP) for consistency.

4. Reduce Downtime with Preventive Maintenance

Machine breakdowns can cost you hours—or even days—of lost production. To avoid this:

  • Schedule routine maintenance (cleaning, oiling, part replacements).
  • Keep spare needles, bobbins, and common parts in stock.
  • Use high-quality threads and stabilizers to prevent thread breaks.

A well-maintained machine runs smoother and increases output.

5. Streamline Workflow & Workspace

Production is not only about the machine—it’s about the entire workflow.

  • Organize threads, hoops, and tools for quick access.
  • Pre-hoop garments while another batch is running.
  • Group orders by design and color to minimize thread changes.

This small step saves hours in the long run.

6. Scale Smartly with More Heads or Machines

If you consistently run at full capacity, consider upgrading to a larger multi head embroidery machine or adding another unit.

  • Start with 4–6 heads if you’re growing.
  • Move up to 12+ heads for large-scale production.
  • Track production data to know when scaling is necessary.

How to Digitize Embroidery Designs for Perfect Results

Embroidery digitizing has revolutionized the way designs are created and embroidered on garments, accessories, and home décor. Whether you’re a small business owner, a hobbyist, or someone working in the apparel industry, understanding the art of digitizing embroidery designs is essential for achieving perfect results.

In this guide, we’ll cover everything you need to know about embroidery digitizing, from the basics to advanced tips, ensuring that you can create flawless designs that stand out. By the end, you’ll have a complete step-by-step process, insider strategies, and SEO-friendly knowledge that will help you master embroidery digitizing like a pro.

What is Embroidery Digitizing?

Embroidery digitizing is the process of converting artwork (logos, graphics, or illustrations) into a digital embroidery file that embroidery machines can read. This file instructs the machine how to stitch the design — including stitch type, direction, density, and sequence.

Unlike simply scanning an image, embroidery digitizing requires a skilled combination of software expertise, design understanding, and fabric knowledge.

Why It Matters

  • Ensures professional, crisp, and long-lasting embroidered results.
  • Saves time and reduces thread wastage.
  • Makes designs scalable across different products.
  • Enhances the quality of your brand presentation.

Tools Needed for Digitizing Embroidery Designs

Before diving into the step-by-step process, let’s look at the tools you’ll need:

  1. Embroidery Digitizing Software
    • Examples: Dahao EM Cad, Wilcom, Hatch, Brother PE-Design, Embrilliance, Pulse, and Ink/Stitch.
    • Each software comes with unique features like stitch simulation, editing tools, and file conversion.
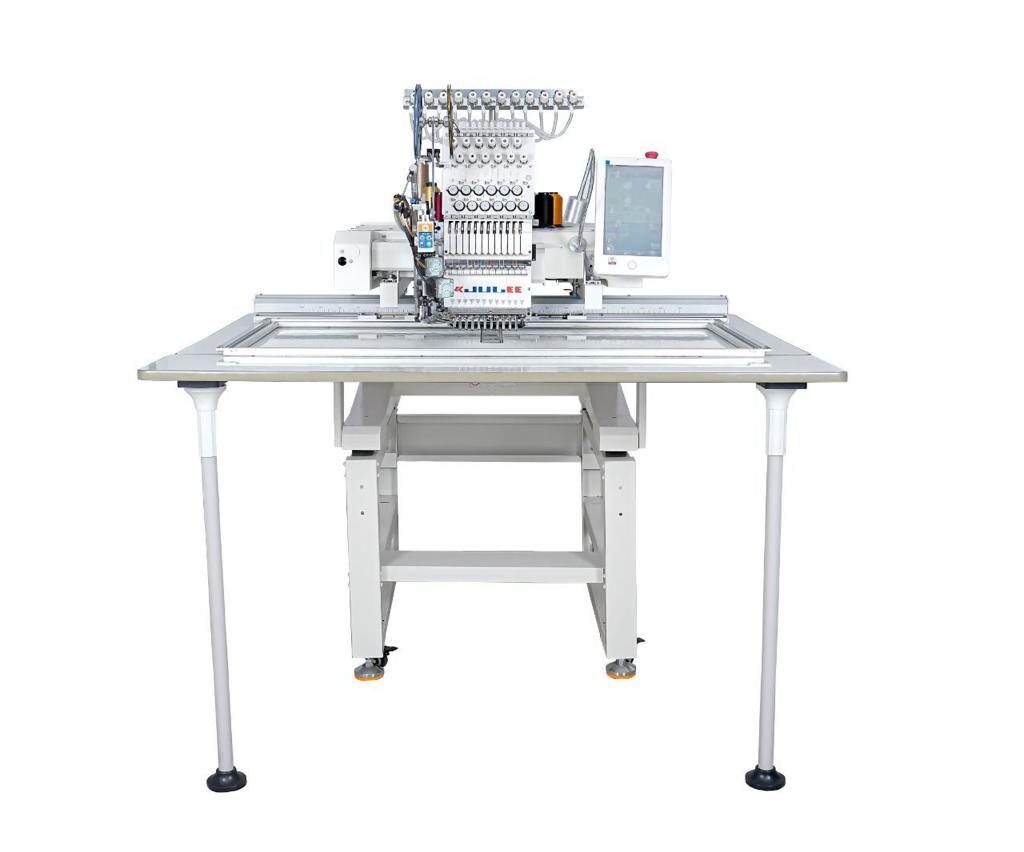
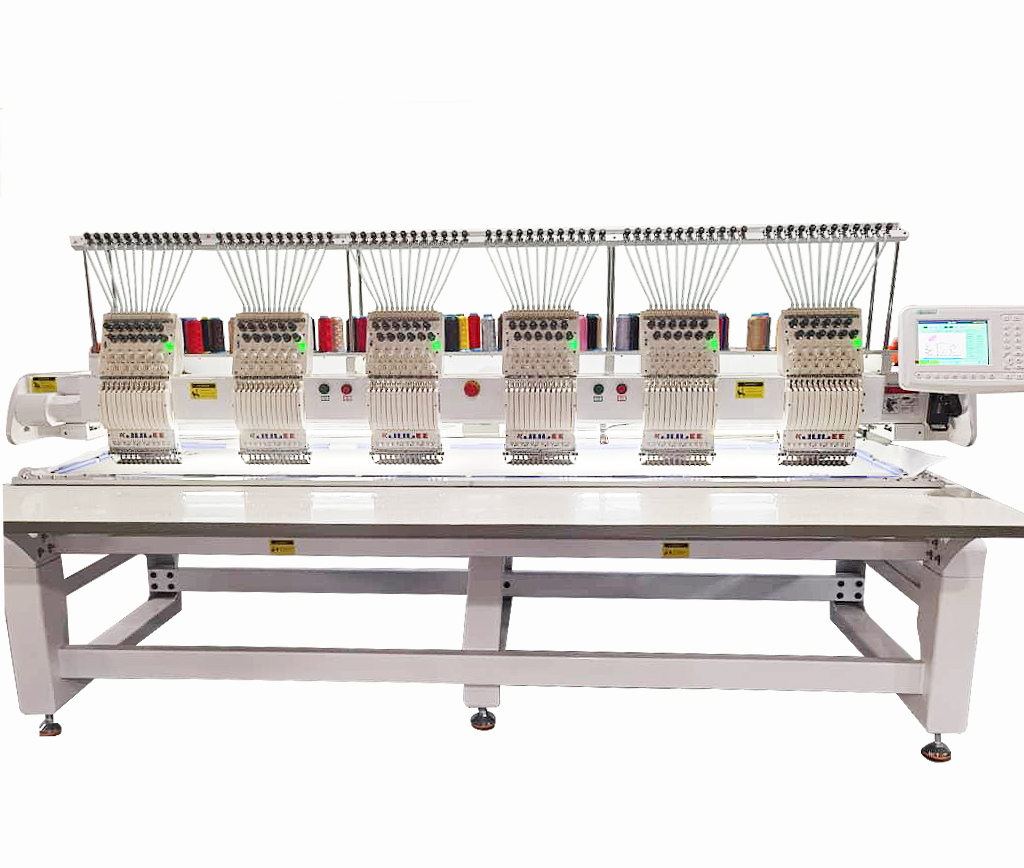
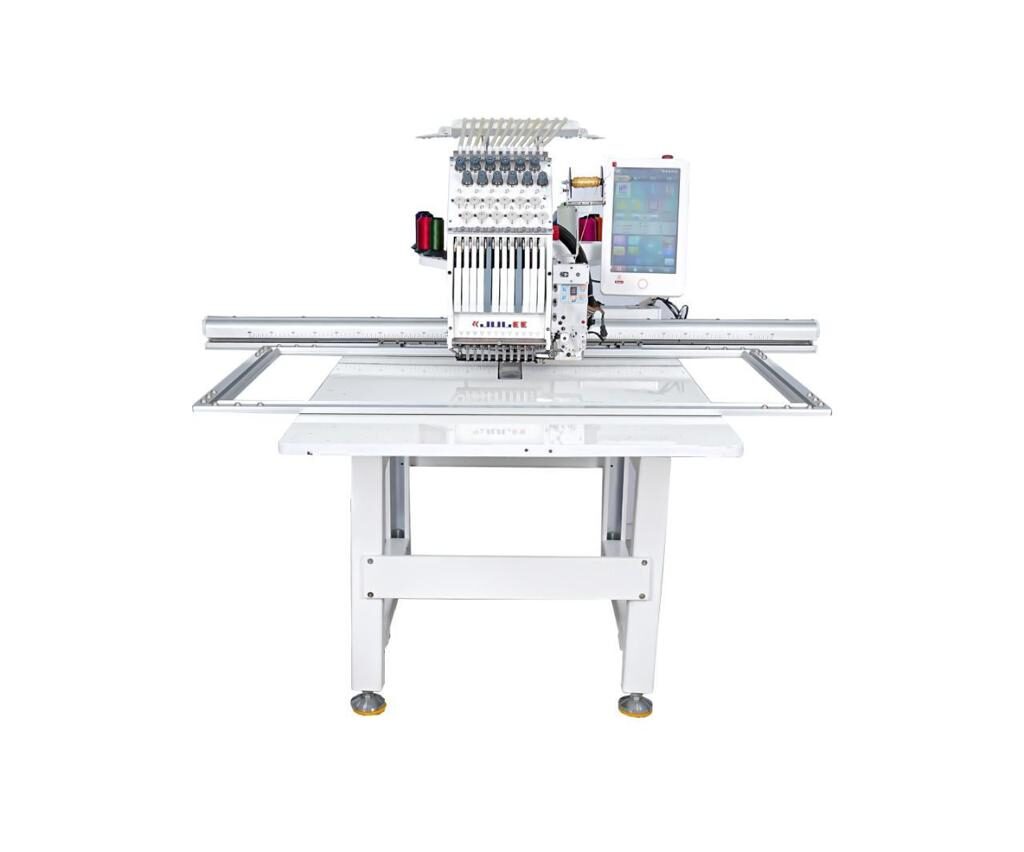
  2. Embroidery Machine
    • Popular brands: Julee, Brother, Janome, Bernina, Tajima, and Ricoma.
  3. Artwork or Logo
    • High-resolution files work best (PNG, SVG, AI, or EPS).
  4. Computer/Laptop
    • Ensure you have sufficient RAM and processing power for handling large design files.
  5. Fabric and Stabilizer Samples
    • Different fabrics (cotton, polyester, denim, silk, etc.) respond differently to stitching.

Step-by-Step Guide to Digitizing Embroidery Designs

1. Prepare Your Artwork

  • Always start with a clean, high-resolution image.
  • Simplify the design (avoid overly detailed graphics that may not stitch well).
  • Ensure contrast and clarity for accurate digitizing.

2. Import Design into Digitizing Software

  • Open your embroidery software.
  • Import the artwork in the correct file format (JPEG, PNG, SVG, etc.).

3. Choose the Right Stitch Types

Embroidery isn’t just about “drawing with thread.” You must select appropriate stitch types:

  • Satin Stitch – Ideal for text and borders.
  • Fill Stitch (Tatami Stitch) – Used for larger areas.
  • Running Stitch – Outlines and fine details.

4. Adjust Stitch Density and Direction

  • Proper density prevents fabric puckering or stiffness.
  • Changing stitch direction adds depth and texture.

5. Set Underlay Stitches

Underlay stitches act as a foundation and prevent shifting. Options include:

  • Edge run underlay
  • Zigzag underlay
  • Center walk underlay

6. Optimize for Fabric Type

  • Light fabrics need lower density and softer underlay.
  • Heavy fabrics like denim require higher density.
  • Stretch fabrics demand careful stabilization.

7. Sequence Your Design

  • Digitize in a logical order (background to foreground).
  • Minimize trims and jumps for efficiency.

8. Save and Export in Machine Format

  • Save the master file (editable).
  • Export to specific machine format (DST, PES, EXP, JEF, VP3, etc.).

9. Test Stitch Out

  • Always run a sample on similar fabric before final production.
  • Adjust density, pull compensation, or thread colors as needed.

Common Mistakes to Avoid

  • Using low-resolution artwork → results in poor stitch quality.
  • Overly dense stitches → causes thread breakage and puckering.
  • Ignoring fabric type → design may not sit properly on certain materials.
  • Not testing the design → costly mistakes in production.
  • Skipping underlay stitches → reduces durability and neatness.

Advanced Tips for Perfect Embroidery Digitizing

  1. Use Auto-Digitizing Carefully
    • Many software programs offer auto-digitizing, but manual adjustments always yield better results.
  2. Apply Pull Compensation
    • Compensate for fabric stretch by slightly extending stitch lengths.
  3. Color Matching
    • Use the correct thread shade for brand consistency.
  4. Keep File Sizes Optimized
    • Large, overly complex files can slow machines down.
  5. Layer Wisely
    • Stitch larger filled areas first, then move to fine details.

Best Practices for Professional Results

  • Always maintain a balance between stitch density and design clarity.
  • Create different versions of the same design for different fabric types.
  • Keep learning! Join digitizing communities, forums, and embroidery groups.
  • Stay updated with software upgrades and industry trends.

SEO Keywords to Use Naturally

To make this blog SEO-friendly and rank organically, here are relevant keywords (use them naturally, not forced):

  • Embroidery digitizing
  • Digitizing embroidery designs
  • How to digitize embroidery
  • Best embroidery digitizing software
  • Embroidery machine file formats
  • Digitizing for embroidery step by step
  • Professional embroidery tips
  • Embroidery design conversion
  • Embroidery digitizing services

FAQs About Embroidery Digitizing

1. Can I digitize embroidery designs without software?
No, you’ll need digitizing software to create embroidery-ready files.

2. What file formats are used in embroidery machines?
Common formats include DST, PES, EXP, JEF, VP3, and HUS.

3. How long does it take to digitize a design?
Simple logos may take 20–30 minutes, while complex artwork can take several hours.

4. Is auto-digitizing good enough?
It works for basic designs, but professional results require manual digitizing.

5. Do I need professional digitizing services?
If you’re new or working with bulk orders, outsourcing to a professional digitizer may save time and reduce errors.

Embroidery Machine Maintenance Tips to Extend Lifespan

A well-maintained embroidery machine isn’t just a tool—it’s the heart of your creative business. Whether you’re producing custom apparel, home décor, or intricate patterns, proper upkeep ensures smooth operation, reduces costly downtime, and extends your machine’s lifespan.

Here’s a professional guide to keeping your embroidery machine in top shape.

1. Clean After Every Use

Lint, dust, and tiny thread fibers can quickly accumulate inside your embroidery machine, especially around the bobbin case and needle plate. Use a small lint brush or compressed air to gently remove debris after each project.
Pro Tip: Always turn off and unplug the machine before cleaning to avoid electrical hazards.

2. Regularly Oil Moving Parts

Friction is the silent enemy of any embroidery machine. Follow your manufacturer’s manual for lubrication points and use only the recommended oil. Over-oiling can be just as damaging as under-oiling, so measure carefully.
Pro Tip: Schedule oiling sessions after every 8–10 hours of machine operation.

3. Check and Replace Needles Promptly

Bent or dull needles can cause skipped stitches, fabric snags, and even damage your machine. Inspect needles before starting any project and replace them after every 8–10 hours of embroidery work.
Pro Tip: Keep an assortment of needle sizes on hand for different fabrics.

4. Monitor Thread Tension Settings

Incorrect tension can lead to poor stitching quality or thread breakage. Test stitch on scrap fabric before starting a new project, adjusting the tension gradually until results are crisp and consistent.

5. Keep Your Machine Covered When Not in Use

Dust is a machine’s worst long-term enemy. Use a fitted cover to protect it from dirt, sunlight, and accidental bumps when idle.

6. Schedule Professional Servicing

Even with regular home maintenance, embroidery machines benefit from professional servicing once or twice a year. Technicians can identify wear-and-tear issues before they become costly repairs.

7. Store in a Stable Environment

Keep your machine in a temperature-controlled area, away from moisture and extreme heat. Humidity can cause rust and electronics damage over time.

Final Thoughts

An embroidery machine is an investment in your craft and business. Treat it with the same care you give to your creations, and it will reward you with years of flawless stitching. Consistent maintenance not only extends its lifespan but also ensures every design comes out exactly as you imagined—perfect and professional.

Start an Embroidery Business in India? (Step-by-Step Guide)

The embroidery industry in India is booming thanks to the demand for personalized clothing, ethnic wear, and home décor. Whether you want to run a custom embroidery service, hand embroidery shop, or computerized embroidery unit, this guide will walk you through every step.

1. Research the Embroidery Market and Identify Your Niche

Before starting, analyze the embroidery business market in India:

  • Custom apparel embroidery services (t-shirts, caps, uniforms)
  • Traditional Indian embroidery for sarees, kurtis, lehengas
  • Embroidery for home textiles like curtains, bedsheets, pillow covers
  • Corporate logo embroidery for promotional items

Study competitors’ pricing, styles, and turnaround times to find gaps you can fill.

2. Create a Detailed Embroidery Business Plan

A solid business plan for embroidery services should include:

  • Business name and logo
  • Startup investment and cost estimates
  • Machinery and materials list
  • Pricing structure and packages
  • Marketing and branding strategy

3. Register Your Embroidery Business and Get Licenses

Legal requirements in India may include:

  • Registering as Sole Proprietor, Partnership, or Private Limited Company
  • GST registration for tax compliance
  • Local trade license from municipal authorities

4. Choose the Right Embroidery Machines and Tools

For professional results, invest in commercial embroidery machines:

  • Single-head or multi-head computerized machines
  • Hand embroidery tools for custom orders
  • Quality threads, needles, and stabilizers

Popular brands in India include Brother, Usha, Janome, and Singer.

5. Set Up an Efficient Embroidery Workshop or Home Studio

Whether you operate from home or a rented shop:

  • Ensure good lighting and ventilation
  • Create organized storage for fabrics, threads, and designs
  • Maintain a clean workspace for quality output

6. Build a Strong Embroidery Brand Identity

To stand out in the custom embroidery business:

  • Design a unique, memorable logo
  • Use attractive packaging and labels
  • Showcase your brand style consistently online and offline

7. Set Competitive Pricing for Embroidery Work

Consider:

  • Cost of raw materials and machine maintenance
  • Labor and time taken for each design
  • Complexity and detailing
  • Local market rates for embroidery services

8. Market and Promote Your Embroidery Business in India

Online marketing:

  • Showcase designs on Instagram, Facebook, and Pinterest
  • Use WhatsApp Business for direct customer orders
  • Create a portfolio website or list on platforms like Etsy, Meesho, and Amazon

Offline marketing:

  • Partner with local boutiques and tailors
  • Participate in exhibitions, craft fairs, and wedding expos
  • Offer introductory discounts to attract first customers

9. Maintain Quality Control and Customer Service Excellence

Delivering high-quality embroidery work with on-time delivery builds trust and repeat business. Keep communication clear and be open to custom design requests.

10. Scale and Expand Your Embroidery Business

Once you have consistent orders:

  • Hire skilled embroidery artisans
  • Upgrade to industrial embroidery machines for bulk work
  • Explore export opportunities for Indian embroidered products

How to Choose the Perfect Embroidery Machine for Sarees, Kurtis & More (2025 Guide)

In India, embroidery is more than just decoration — it’s an art form woven into the culture. From the intricate zari work on a silk saree to the delicate floral patterns on a kurti, embroidery transforms ordinary fabrics into stunning pieces of wearable art.
If you are a small business owner, boutique owner, or home-based entrepreneur looking to expand your offerings, investing in the right embroidery machine is a decision that can define your success.

But with so many options in the market, how do you choose the perfect embroidery machine for sarees, kurtis, and other ethnic garments? This guide will walk you through everything you need to know — and why Julee Embroidery Machines have become a trusted choice for small businesses across India.

Why Your Choice of Embroidery Machine Matters

Embroidery machines aren’t a one-size-fits-all purchase. The wrong machine could limit your creativity, slow down production, and even lead to wasted materials. For example:

  • Saree embroidery often requires a large hoop size and the ability to handle delicate fabrics like silk, chiffon, or georgette.
  • Kurti embroidery demands precision for neckline and yoke patterns.
  • Dupattas, blouses, and kidswear need versatility in design and stitch types.

Choosing the right machine means you can work faster, maintain consistent quality, and take on larger or more diverse orders — directly increasing your profit margins.

Understand Your Embroidery Needs

Before buying, think about the type of garments you plan to focus on:

  1. Sarees
    • Require wide hoop capacity for pallu and border work.
    • Ability to handle intricate designs with metallic threads and fine detailing.
  2. Kurtis
    • Often need medium hoop sizes for front, neckline, and sleeve embroidery.
    • Popular designs include florals, paisleys, and modern abstract patterns.
  3. Other Garments
    • Blouses and dupattas may require a combination of small and large frames.
    • Kidswear may need softer stitching and colorful, playful motifs.

By understanding your garment focus, you can narrow down your machine choices more effectively.

Key Features to Look For

When shopping for an embroidery machine in India, especially for traditional garments, these are the must-have features:

  • Hoop Size & Frame Flexibility – A machine that offers both large and small hoop sizes ensures you can work on everything from saree pallus to kurti necklines.
  • Needle Count – Multi-needle machines (like the Julee single head embroidery machine models) allow you to run multiple colors at once, saving time on big orders.
  • Design Input Options – USB ports or memory card slots let you import custom designs.
  • Speed (RPM) – Higher stitches per minute mean faster delivery without compromising quality.
  • Fabric Compatibility – Ensure the machine can handle both heavy silks and delicate chiffons.
  • Ease of Use – Touchscreen panels, built-in design editing, and auto-threading make a big difference for small business productivity.
  • After-Sales Support – Training, spare parts availability, and service response time matter as much as the machine itself.

Types of Embroidery Machines

Single Head Embroidery Machines

Compact, easier to maintain, and suitable for a variety of designs.

Ideal for startups or small-scale boutiques.

Multi-Head Embroidery Machines

Perfect for businesses fulfilling wholesale orders or working with multiple fabrics simultaneously.

Best for higher production volumes.

Why Julee Embroidery Machines Stand Out

When it comes to sarees, kurtis, and more, Julee Embroidery Machines have carved a strong reputation for affordability, reliability, and performance.

1. Julee Single Head Embroidery Machine

  • Perfect for: Startups, boutique owners, and home-based businesses.
  • Key Features:
    • High-speed stitching for quick order completion.
    • Multiple hoop sizes for different garment needs.
    • USB design import for unlimited creativity.

2. Julee Multi Head Embroidery Machine

  • Perfect for: Medium to large-scale manufacturers.
  • Key Features:
    • Multi synchronized heads for bulk production.
    • Built to run long hours without overheating.
    • Suitable for multi-color embroidery without constant re-threading.

Budget & ROI Considerations

An embroidery machine is an investment — not just an expense. Even a small boutique can recover costs within months if the right machine is chosen. Julee machines are priced to give maximum return on investment through:

  • Lower maintenance costs.
  • Fast production speed.
  • Long-lasting durability.

Maintenance Tips for Longevity

  • Clean and oil your machine regularly.
  • Use genuine parts and quality threads.
  • Store in a dust-free environment.
  • Get periodic servicing from authorized technicians.

Ready to take your embroidery business to the next level?
👉 Visit JuleeEmbroidery.in to explore models, check prices, and request a free demo today.

Multi Head vs Single Head Embroidery Machines: Which is Right for Your Business?

Choosing between a multi head embroidery machine and a single head embroidery machine is a major decision for any embroidery business. The right choice can improve your production speed, cost efficiency, and profit margins. In this guide, we’ll compare both options so you can confidently pick the one that matches your business goals.

1. Single Head Embroidery Machines

Definition:
A single head embroidery machine has one embroidery head that stitches one garment at a time.

JL TM – 2040 is top most selling product in Julee. There is no comparison for this product.

Best For:

  • Home-based embroidery businesses
  • Small-batch custom orders
  • Limited workspace setups
  • Lower investment cost — ideal for startups
  • Easy to operate — perfect for beginners
  • Flexible for sampling and one-off designs

2. Multi Head Embroidery Machines

Definition:
A multi head embroidery machine features multiple heads, each working simultaneously. For example, a 6-head machine can embroider six garments at once.

One of the finest and better durable for garments is our Julee Multi head embroidery machine. Easy operatable and high efficiency in multi purpose.

Best For:

  • Established embroidery businesses
  • High-volume production
  • Consistent bulk orders
  • High production efficiency — complete large orders faster
  • Lower labor cost per item
  • Consistent quality across multiple garments

For more products – Visit our page

3. How to Choose the Right Embroidery Machine for Your Business

Before deciding, ask:

  • What’s my average order size?
  • Do I need flexibility or high-volume speed?
  • What’s my budget and available space?

Quick Recommendation:

  • Startups & custom-order businesses → Single Head Machine
  • Scaling businesses with large, consistent orders → Multi Head Machine

3. Key Differences Between Multi Head and Single Head Machines

FeatureSingle HeadMulti Head
Production SpeedLowHigh
Investment CostLowHigh
FlexibilityHighLow
Best ForSmall ordersBulk orders

FAQs: Multi Head vs Single Head Embroidery Machines

1. Which is better: a multi head or single head embroidery machine?
It depends on your business needs. A single head embroidery machine is ideal for small orders, sampling, and custom work, while a multi head machine is better for high-volume, consistent orders.

2. What is the main advantage of a multi head embroidery machine?
The biggest advantage is speed — multi head machines can produce multiple garments at the same time, reducing turnaround time and lowering labor costs per piece.

3. Are single head embroidery machines good for business?
Yes, especially for startups or small embroidery shops. They require a smaller investment, are easier to operate, and allow for flexibility in handling varied orders.

4. How many garments can a multi head embroidery machine make at once?
It depends on the number of heads. For example, a 6-head machine can embroider six garments simultaneously with the same design.

5. When should I upgrade from a single head to a multi head embroidery machine?
Consider upgrading when your order volume increases, you’re regularly producing bulk orders, or you want to reduce production time to meet growing demand.

Your embroidery machine is the backbone of your production. Whether you choose a single head or multi head embroidery machine, ensure it aligns with your order volume, budget, and long-term growth strategy. The right choice will save you time, reduce costs, and boost profits.

Best Single Head Embroidery Machines in India (2025 Buyer’s Guide)

In 2025, embroidery businesses in India are booming — from boutique designers to garment manufacturers, everyone is looking for speed, precision, and versatility. If you’re starting out or expanding, a single head embroidery machine could be your best investment.
This guide will walk you through the top models in India, their features, prices, and how to choose the right one for your needs.

Why Choose a Single Head Embroidery Machine?

Single head machines are ideal for:

  • Small to medium businesses producing customized pieces.
  • High precision designs for sarees, kurtis, caps, and bags.
  • Low maintenance and easy operation, even for beginners.
  • Portability — can be moved and set up anywhere.

“See our full range of embroidery machines here” → link to products page.

Key Features to Consider Before Buying

  1. Embroidery Area – Larger areas mean more design flexibility.
  2. Speed (Stitches Per Minute) – Higher speed = faster delivery.
  3. Needle Count – More needles = faster color changes.
  4. Ease of Use – Touchscreen controls, auto-thread trimming, and error detection.
  5. Support & Warranty – Always check for Indian service availability.

Expert Recommendation

If you’re a small business owner looking for a balance between cost, durability, and quality, the Julee Embroidery JL TM – 2040 offers an excellent all-round performance — with Indian-specific service support, spare parts availability, and customization options.

We are also in Indiamart – Link of our Indiamart page

Maintenance Tips for Longevity

  • Clean bobbin area daily.
  • Lubricate moving parts weekly.
  • Use high-quality threads to reduce machine wear.
  • Schedule quarterly professional servicing.

A single head embroidery machine is not just a purchase — it’s an investment in your business growth. Choosing the right model will help you deliver better quality, faster turnaround, and attract more customers.

💬 Need help choosing?
Contact Julee Embroidery for a free consultation and demo across India.
📞 Call/WhatsApp: +91-8825478070
🌐 Visit: juleeembroidery.in